One of the more interesting frameworks in iOS 8 is Health Kit, system-wide persistent storage for health-related information. I'm just beginning to explore the namespace myself, but thought I'd walk through the steps you need to manipulate Health Kit with Xamarin.
Because health-related information is so sensitive, developing for Health Kit requires:
- The app be developed using an "Explicit App ID" with Health Kit Services explicitly enabled (see below);
- The
Entitlements.plistmust have acom.apple.developer.healthkitkey set totrue; and - At initial runtime, the user must grant access via a detailed permissions dialog
Additionally, it's worth emphasizing the importance of checking error codes in Health Kit API function calls. If a user does not grant permission or if for any other reason the app makes a call to a non-permitted API, this does not raise an exception. Rather, a null or otherwise empty result will be returned and typically an out NSError or closure-parameter will be set.
Provisioning and Permissions
Xamarin has a great article on device provisioning, but just to hit the highlights for Health Kit:
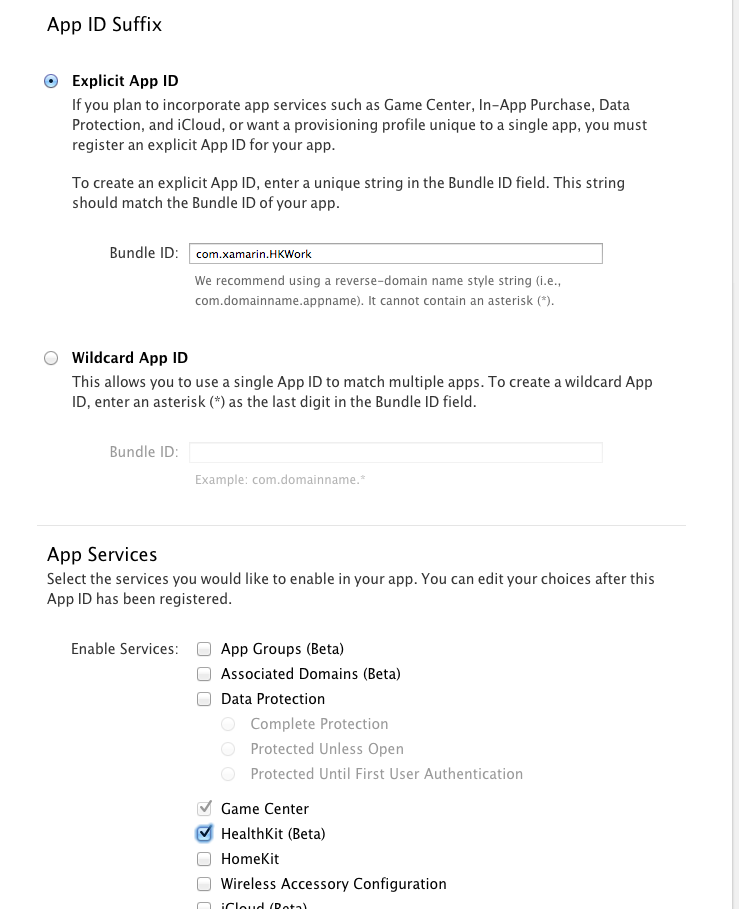
You need to set an "Explicit App ID" and explicitly enable "Health Kit" as an app service. Here, I'm created an ID for an app whose ID is "{PREFIX}.com.xamarin.HKWork":

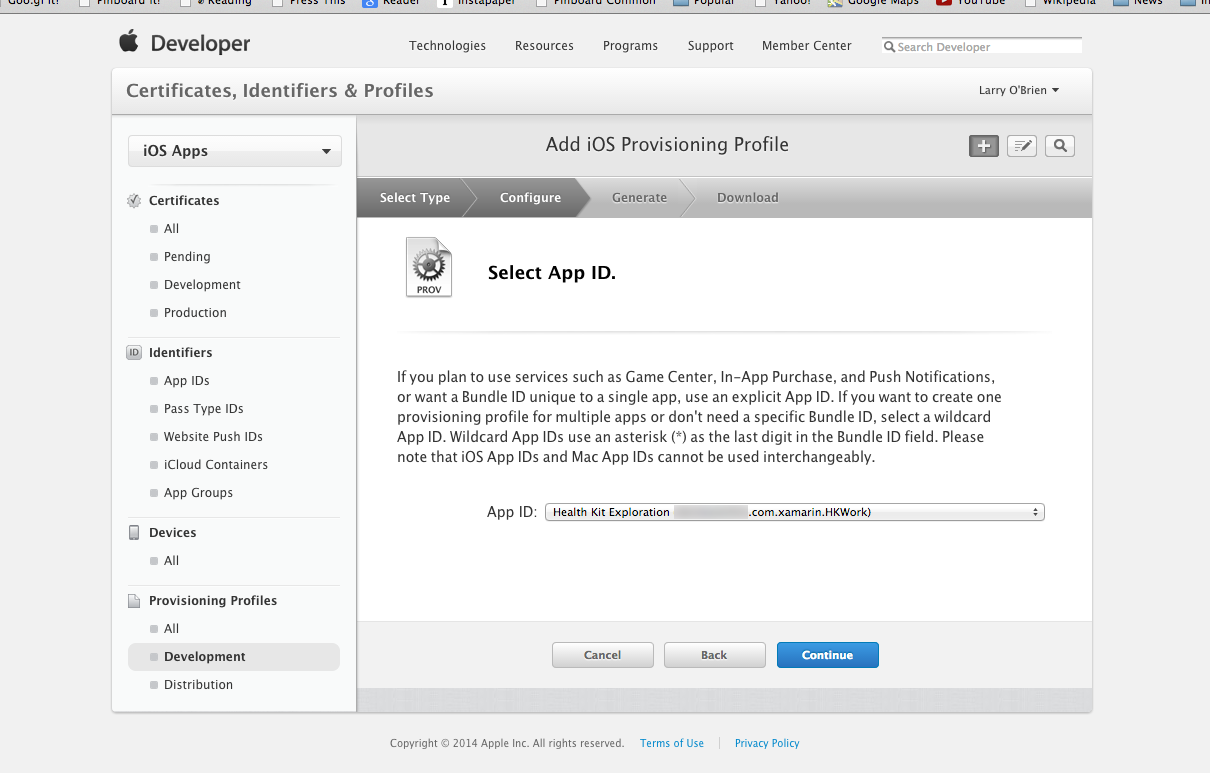
After you do that, you'll have to create a new provisioning profile for this App ID:
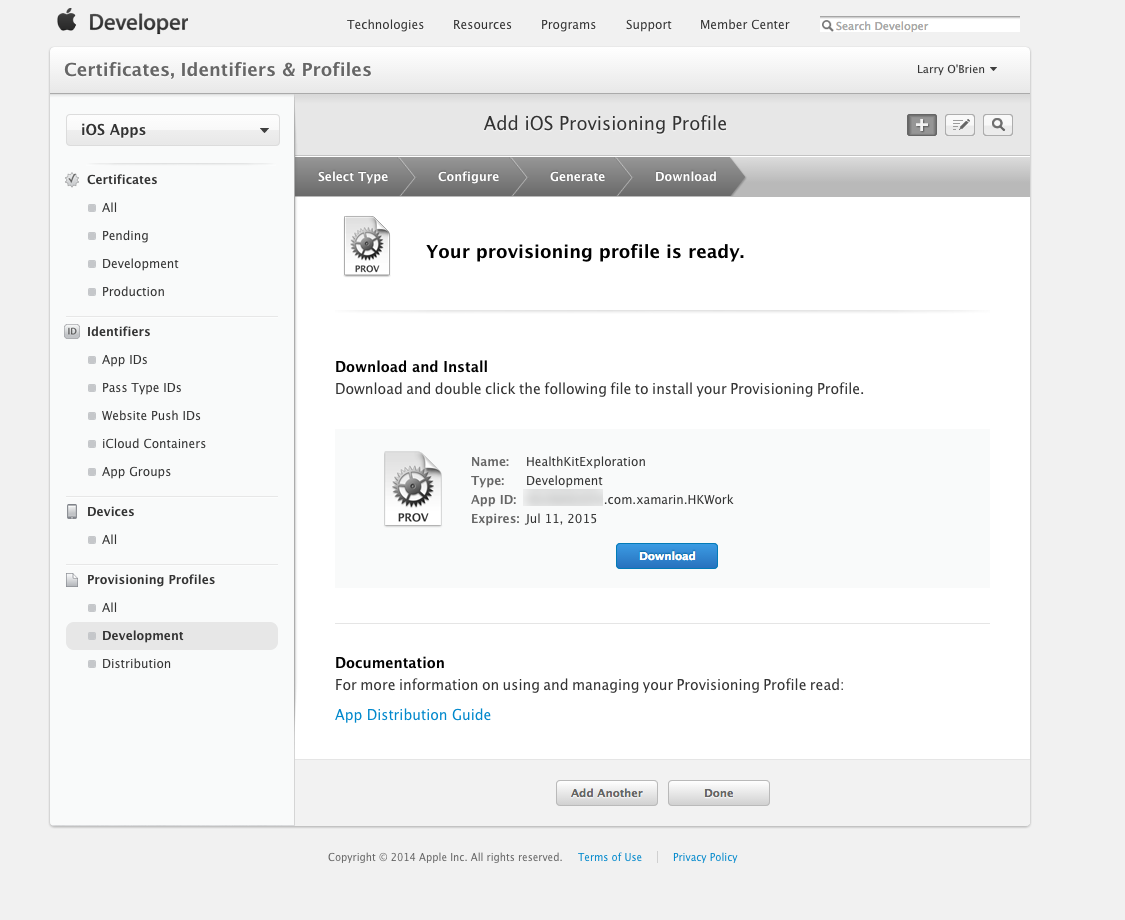
Once you've awaited the generation of the profile, download it and double-click to install it on your development system:
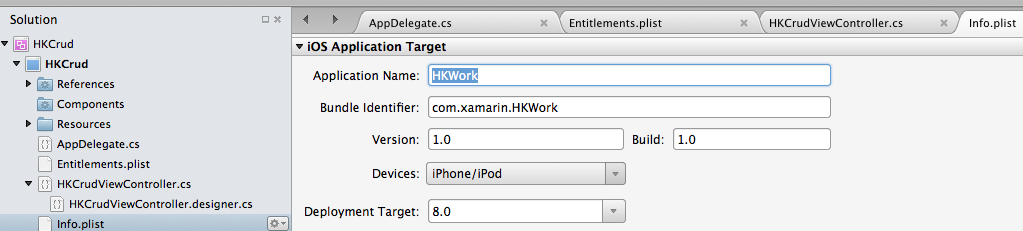
Now, in your Xamarin Studio project, open your Info.plist and set the Bundle Identifier to your explicit App ID (without the team prefix):
And set your project's Bundle Signing options so that you are using your new provisioning profile:
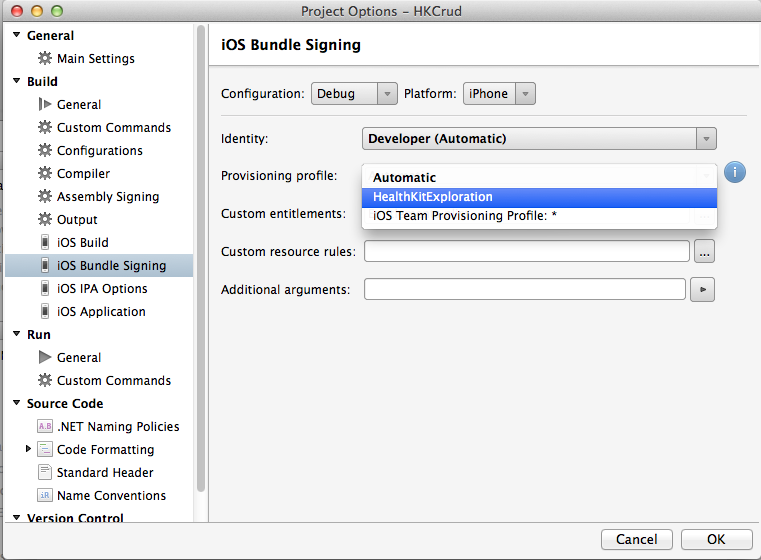
(Now that I've written that, I suspect that you can probably leave it as "Automatic", since the App ID is explicitly the same as that in the custom provisioning profile: that's how the two are matched by the system. But still, I'm going to leave the step just to be clear what's happening. And I don't think there's any harm in setting the provisioning profile explicitly.)
You've taken care of Info.plist, so now open Entitlements.plist. (Some project templates don't automatically generate an Entitlements.plist file. If your project doesn't have one, use File/New File.../iOS and choose Entitlements.plist.) Click on "Source" and add a new key com.apple.developer.HealthKit of type Boolean with a value of Yes (== true):

Write code to request permission from the app user
To use Health Kit, the user must grant your app access. This involves these API calls:
[code lang="csharp"]
var temperatureKey = HKQuantityTypeIdentifierKey.BodyTemperature;
var tempQuantityType = HKObjectType.GetQuantityType (temperatureKey);
var hks = new HKHealthStore ();
hks.RequestAuthorizationToShare (new NSSet (new [] { tempQuantityType }), new NSSet (), (success, error) => {
Console.WriteLine ("Authorized:" + success);
if (error != null) {
Console.WriteLine ("Authorization error: " + error);
}
});
[/code]
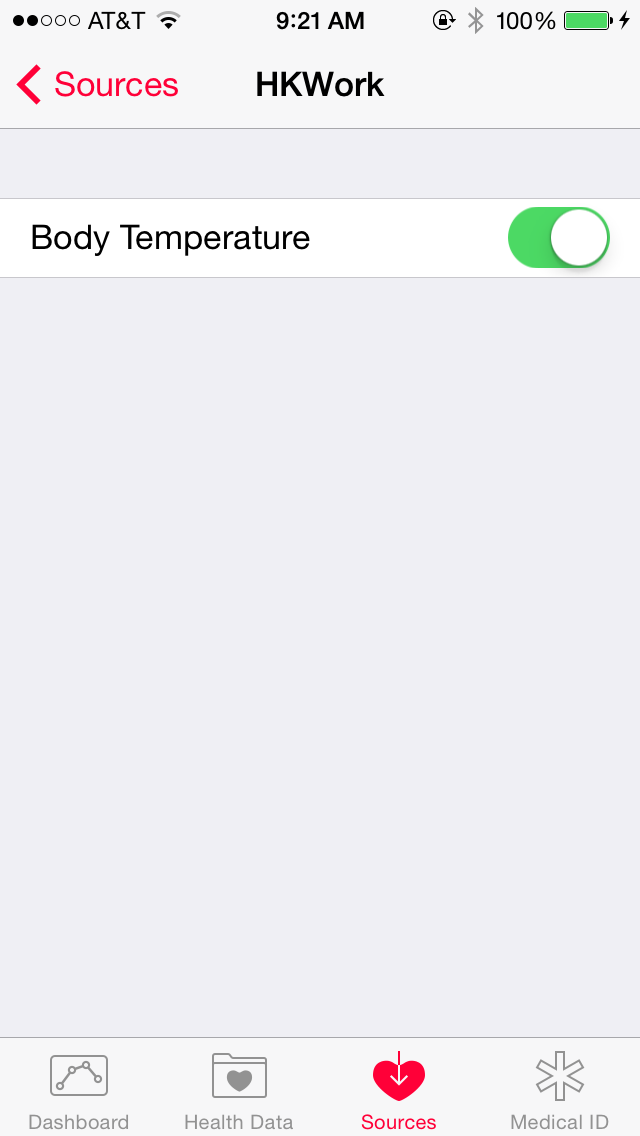
Here, we are requesting authorization to share body temperature data (i.e., "share data generated by my app with the HealthStore database"). When this app is run, the user will be presented with the Health Kit permissions dialog, which will give the user fine-grained control over the requested types of data you'll share. In this case, for instance, the dialog inside the Health app looks like this:
Write a brilliant app
I have no insight into how to do that.
... that has some health-related information
Oh good, I can help with that.
Creating and storing data in the shared HealthKit store involves these API calls:
[code lang="csharp"]
var temperatureKey = HKQuantityTypeIdentifierKey.BodyTemperature;
var tempQuantityType = HKObjectType.GetQuantityType (temperatureKey);
var myCurrentTemp = HKQuantity.FromQuantity (HKUnit.DegreeFahrenheit, 98.6);
var meta = NSDictionary.FromObjectAndKey (new NSNumber (4), HKMetadataKey.BodyTemperatureSensorLocation);
var tempSample = HKQuantitySample.FromType (tempQuantityType, myCurrentTemp, new NSDate (), new NSDate (), meta);
hks.SaveObject(tempSample, (success, error) => {
Console.WriteLine("Write succeeded: " + success);
if(error != null)
{
Console.WriteLine(error);
}
});
[/code]
I trust it's obvious that the types of data you attempt to store must match those you've requested permission from the end-user and that your error-handling should be considerably more sophisticated (since it's incredibly possible that app users are going to be very cautious about allowing access to their medical data, even if it's clearly central to the app's value).
The resulting shared data (assuming that permissions are granted) looks like this in the Health app:
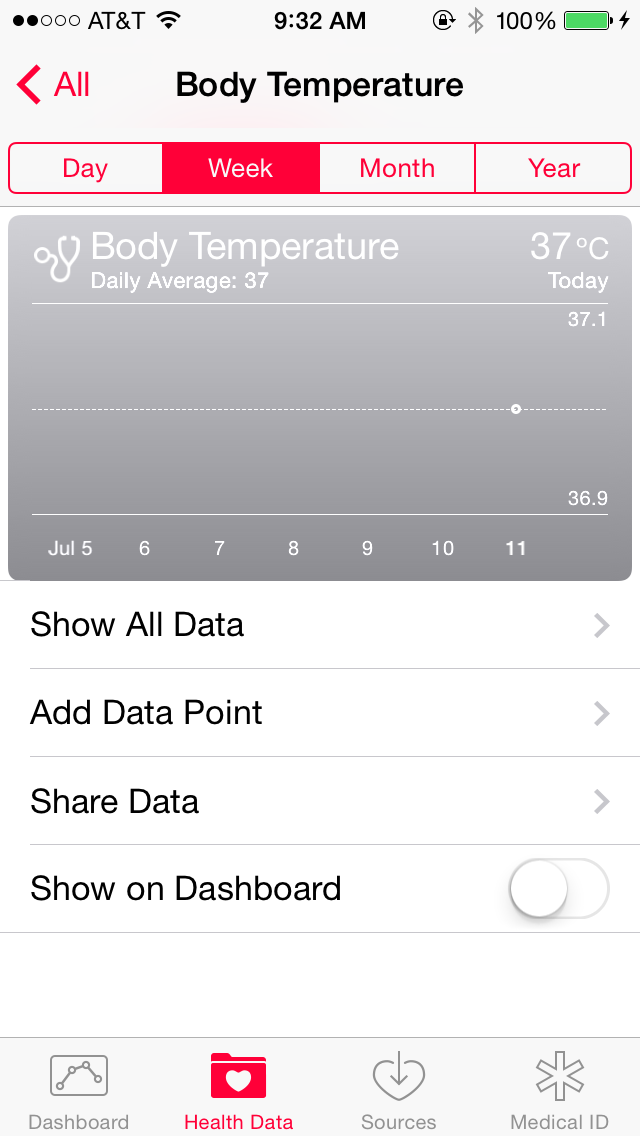
Notice that although I created the data using Fahrenheit, in this case it's being displayed as Celsius (which I imagine is the opposite of the likely use-case!). Units of measure and conversions are built in to Health Kit, which I'll cover in a later post. For now, though: Happy Healthing!